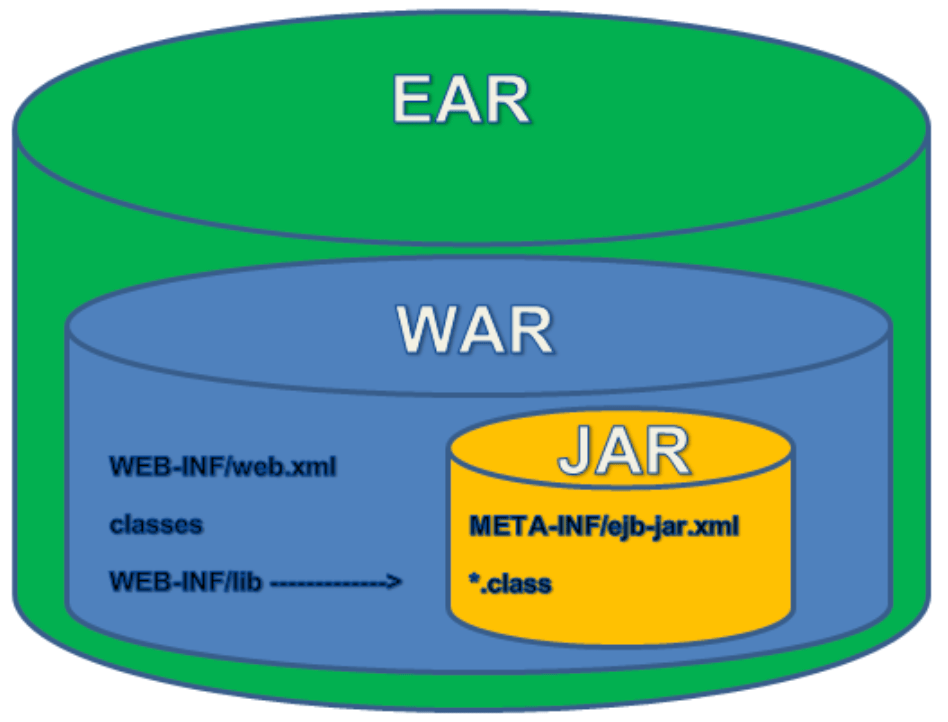
Hey There!! Do you remember these?
JSPs and WAR file deployments are still around. Why? Because they work, and meet a need. There is no-shame in that. As we move into cloud, there are other tools and frameworks (namely Spring) that can be used to help deploy these applications in a slightly modified state, leverage the existing investment, in a minimally invasive approach. Now, could these be updated and modernized, YES they could. That’s a topic for another conversation.
A BIG THANKS to my friend, Spring-Java RokStar, Dashaun Carter for pointing this out, and a big help!
Below are steps for scaffolding a springboot project that you can build a springboot application, that deploys and follows the java WAR spec. This will give you the basis to lift-and-shift the rest of your code into, and get working.
Steps:
#1 Start out at https://start.spring.io/, from here we will build out our skeletal project.
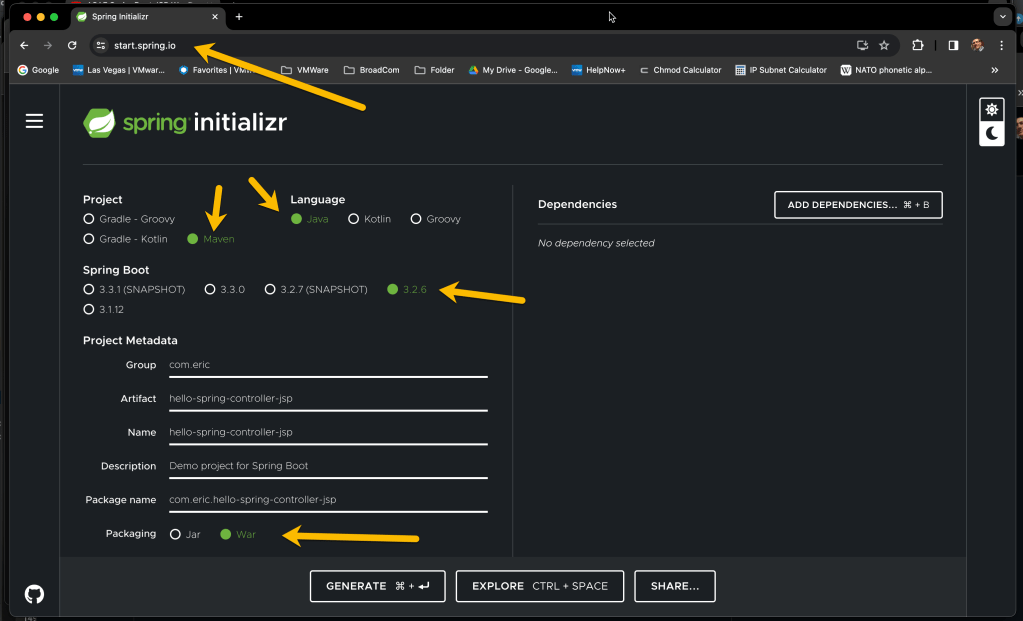
We are going to select:
Java as our language
Maven as our build tool
Springboot-3.2.6
Packaging as a WAR.
#2 Next, we need to add dependancies.

Hit the “Add Dependancies” button, and add each of the following. Once you have added all the, should look like above. Then Hit “Generate”
-GraalVM Native Support
-Spring Web
-Spring Boot Actuator.
#3 Download your project. Select a folder to place your .ZIP file.
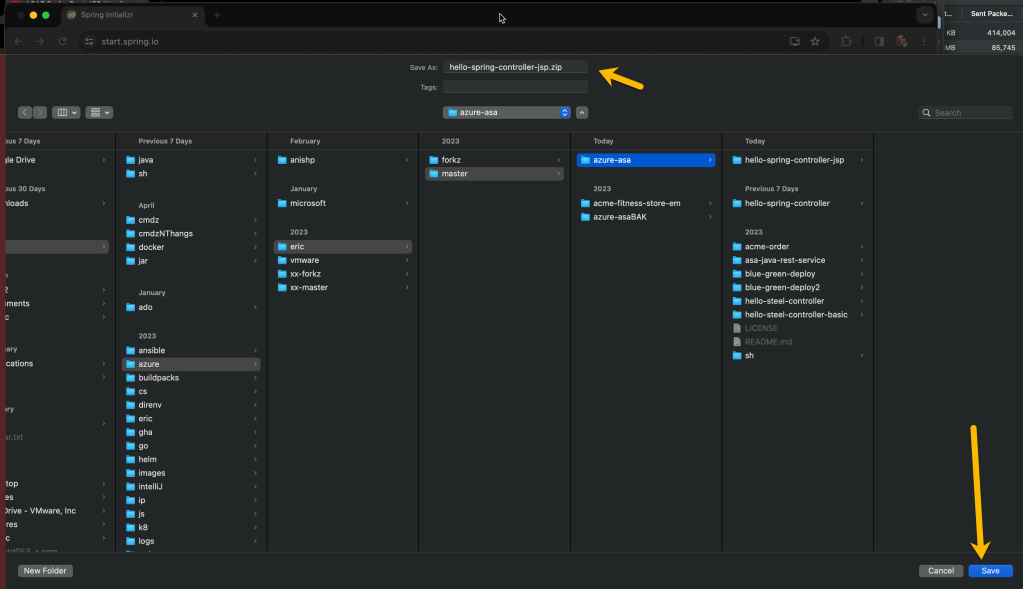
Once folder selected, Hit “Save”.
#4. After you downloaded the .zip file, unzip it, and then import the project into your IDE. Below I’m using IntelliJ [ 2024.x ].
Then, pull up the pom.xml, and we need to make a few changes.
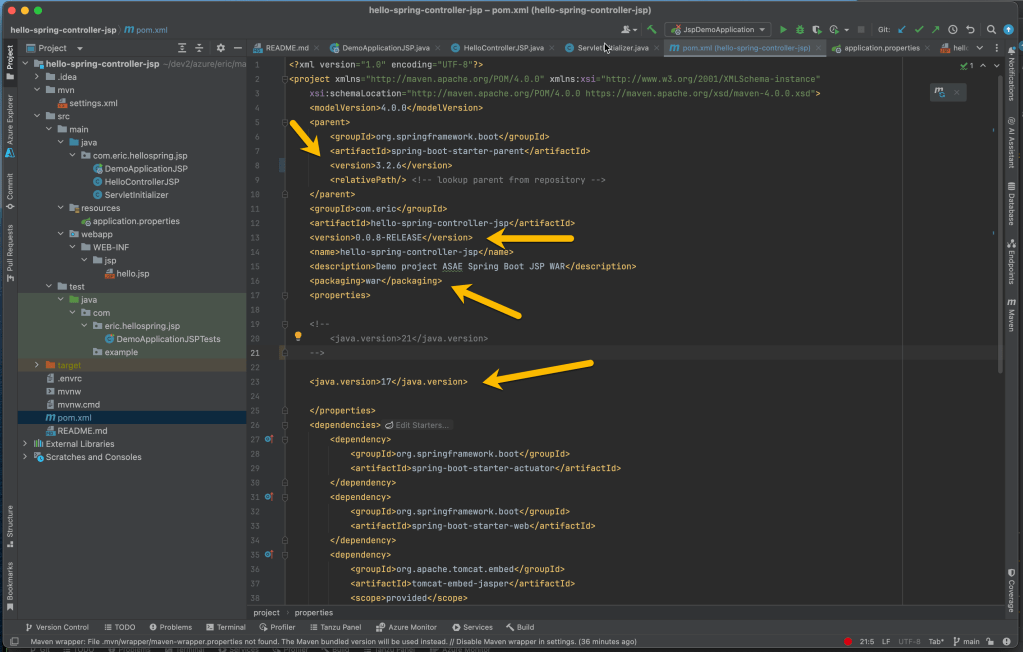
Verify you have the proper spring-boot version.
I modified my artifact-version, changed to -RELEASE candidate.
Verify you have packaging set to: WAR.
Set Java version back to 17.
#5 Modify Dependancies.

Manually add jasper, as above.
#6 Review the main application class.
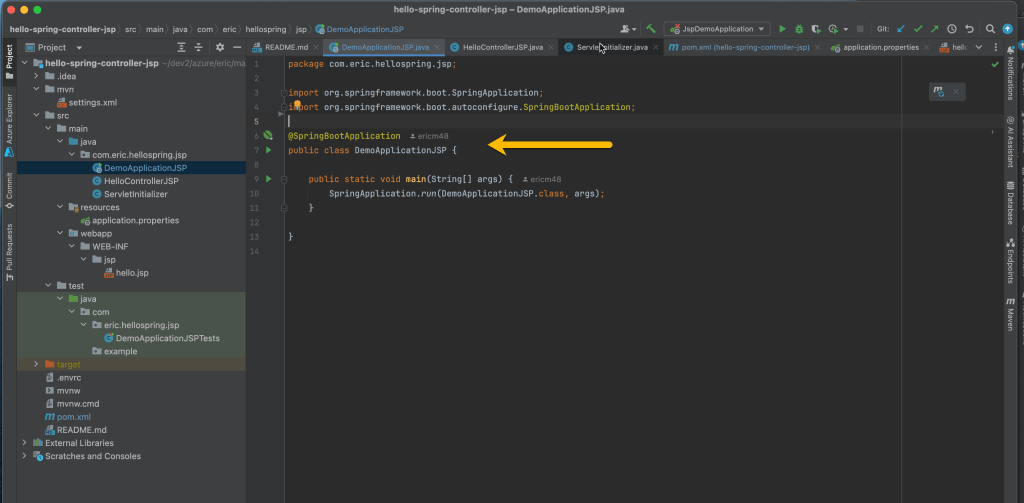
Verify your main application class is as above.
#7 Manually Add the Controller Class.
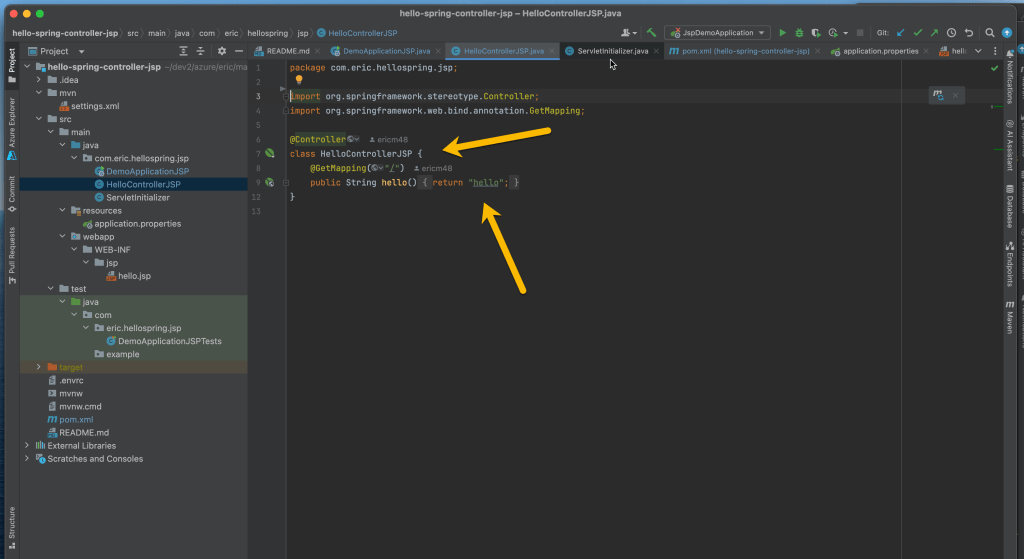
At the time of this writing, the controller class is not added by the initializer. Add that class manually, setting the mapping as context root (ie “/”).
#8 Modify application.properties
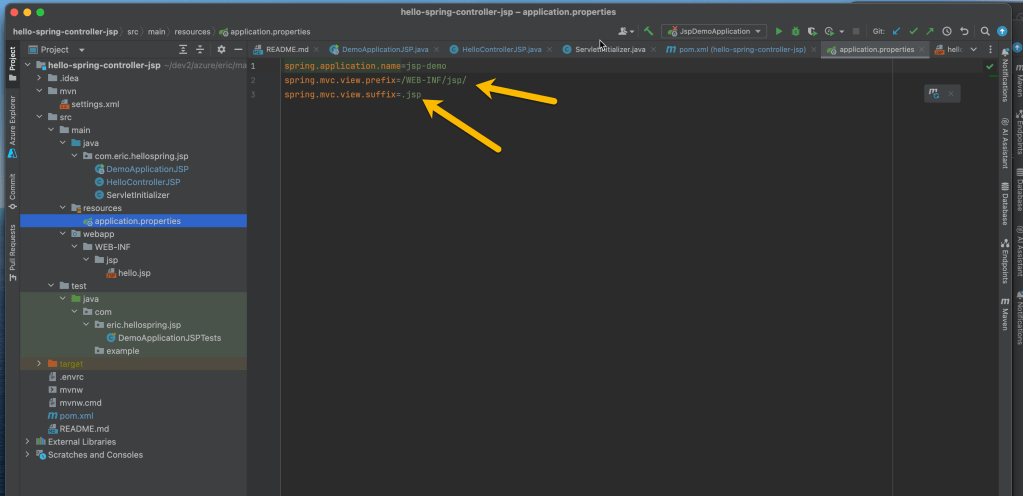
To get the JSP-WAR mapping to work [ CRITICAL-STEP ] with spring-boot, we need to add the keys with the following values:
application.properties
...
spring.mvc.view.prefix=/WEB-INF/jsp/
spring.mvc.view.suffix=.jsp
...
#9 Refactor folder structure.
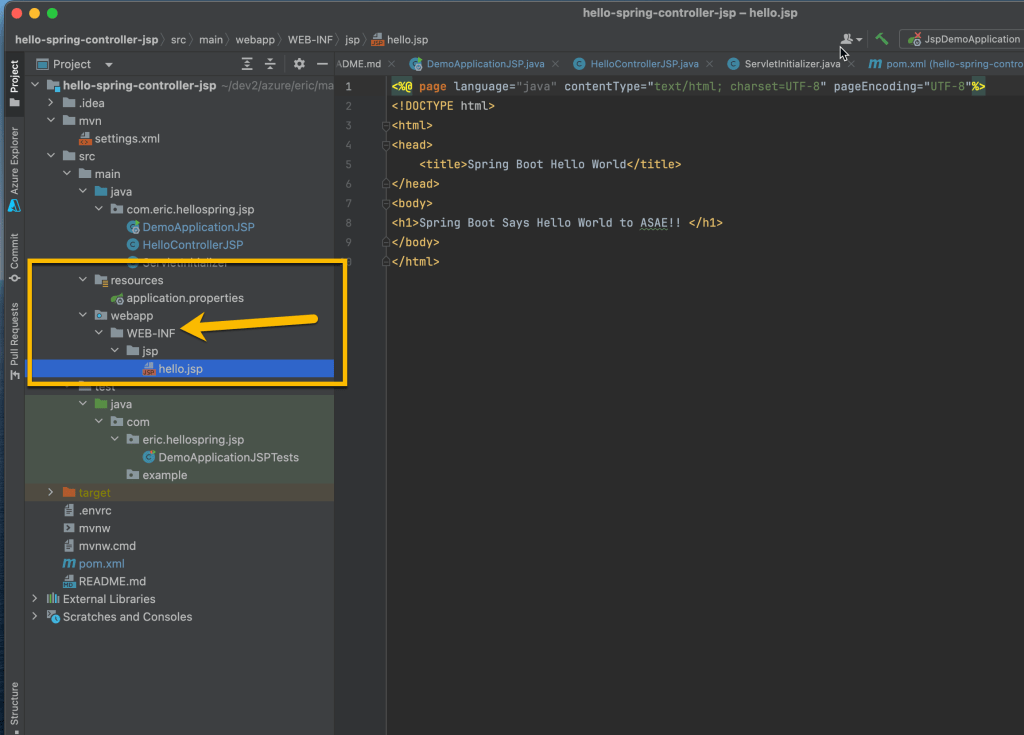
Again, to get the JSP-WAR mapping to work [ CRITICAL-STEP ] with spring-boot, we need refactor the package structure under ./src/main/. This is the main change to get spring-boot java to work under the java WAR spec.
Create the folder:
./src/main/webapp/WEB-INF/jsp
Place your .jsp files in this folder.
#10 Build the artifact.
Run your build (note the war-build):
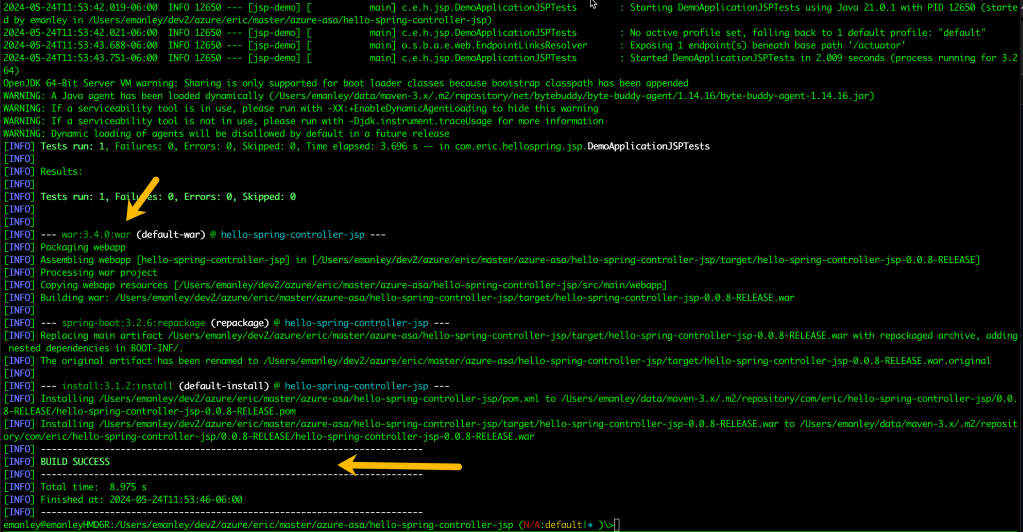
mvn clean install
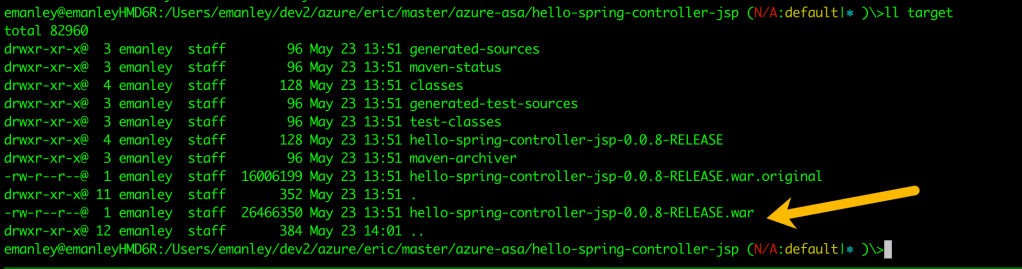
Looking at the ./target/ folder, this will yield a .WAR artifact.
#11 Deploy to Azure, use the following commands. Below are mine, with my naming, and azure region. You may wish to modify these. Also assumes, you’ve created the necessary resource-group.
# azure login
az login
# create the app-slot within ASAE Server Instance.
# Assumes an ASAE Server instance is ALREADY created.az spring app create -n hello-spring-controller-jsp -s hello-spring-controller-ent \
-g azure-asa-uswest --assign-endpoint true \
--verbose &
# verify app is created
az spring app list -s hello-spring-controller-ent -g azure-asa-uswest
# deploy the app
az spring app deploy -n hello-spring-controller-jsp -s hello-spring-controller-ent -g azure-asa-uswest \
--artifact-path ./target/hello-spring-controller-jsp-0.0.8-RELEASE.war \
--build-env BP_JVM_VERSION=17 \
--verbose &
# get application logs
az spring app logs -n hello-spring-controller-jsp -s hello-spring-controller-ent -g azure-asa-uswest --lines 100 -f
# hit the application (double-check your url, it may be different.
https://hello-spring-controller-ent-hello-spring-controller-jsp.azuremicroservices.io
curl -v https://hello-spring-controller-ent-hello-spring-controller-jsp.azuremicroservices.io
# delete the app
az spring app delete -n hello-spring-controller-jsp -s hello-spring-controller-ent -g azure-asa-uswest &
A couple of things to note:
-The github repo can be found here: https://github.com/ericm48/azure-asa/tree/main/hello-spring-controller-jsp
-Be aware of the .envrc files, as these have values specific to my implementation, yours will differ.
Enjoy!
